
Do you ever wonder about what the behind the scenes of a food photography shoot looks like? Are you curious to know what equipment is used? Look no further! I’m sharing my most used food photography equipment with you today. This is my list of photography gear for food photographers that I use most often.
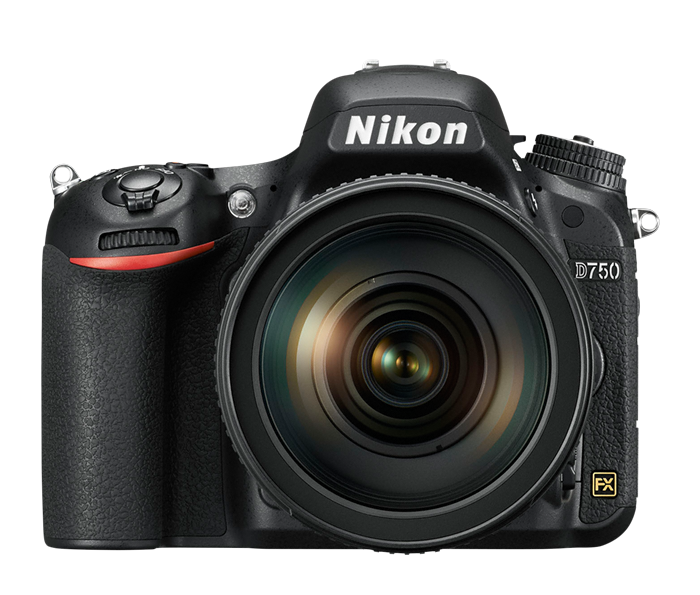
1. Camera
You need a professional camera. There’s no way to become a professional photographer without a professional camera. Whether you choose a DSLR or maybe even a mirrorless, you need a full-frame camera with interchangeable lenses. I shoot with a Nikon D750. It’s not the newest Nikon DSLR, but it works exactly how I need it. It’s lightweight, fast, and produces incredible raw images.
2. Lenses
There are hundreds of lenses on the market, but I use only 3 in my food photography endeavors! My most used lens is my 50mm 1.8. I call it my everyday lens because I use it no matter what I’m shooting. Food, portraits, lifestyle, it’s tried and true and my favorite lens. My second most used lens is my 105mm 2.8. This is my macro lens, which means I use it to shoot close up to my subject. This lens is my favorite for picking up textures in food. My third most used lens is my 24-70mm 2.8. I don’t use this lens as often as the other two, solely because it’s not as sharp. Since it’s a zoom lens, there’s a lot of glass in this lens, making the focus not as crisp as the prime lenses I use the most. I do use it when I need a wider shot. I use this lens when I’m shooting down on a table on a bunch of different dishes and need to get them all in the frame.
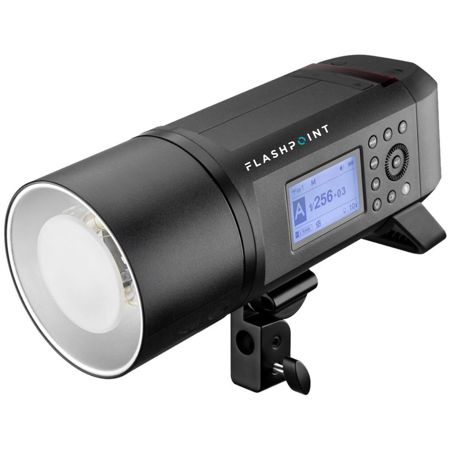
3. Lights
Okay, I will admit that I used to be a “natural light” photographer, but it’s because I didn’t know how to use artificial light. My lights are the most expensive part of my gear that I have purchased this year. They were worth every penny. I use Flashpoint XPLOR 600 Pro lights. The two major selling points of these lights are they are cordless and have HSS capabilities. The cordless aspect comes in handy on location so that I don’t have to limit myself to places with electrical outlets. It’s easy to bring lights room to room. HSS stands for high-speed sync. This means that I can shoot on an extremely fast shutter speed with these lights to freeze motion easily. My old lights could only reach a speed of 1/200!
Don’t forget, you’ll need an assortment of softboxes and attachments for your lights for maximum versatility!
Lighting equipment is a game-changer. I couldn’t do 90% of my work if I didn’t have professional lights. They are a major part of photography gear for food photographers.
4. Tripod
As much as I try to fight it, I use my tripod so often on projects. I couldn’t create stop motion videos without it. It makes my life easier by letting me work hands-free. But most of all, it keeps my photos crisp and sharp! I use a ball head tripod so I can move my camera around at different angles without restriction. The head is also interchangeable with my overhead tripod attachment for top-down shots.
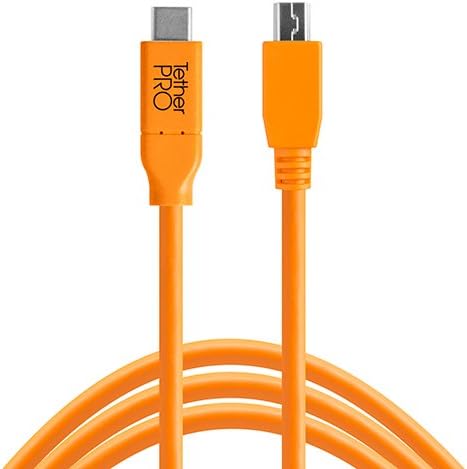
5. Tether Cable
This bright little cord is the key to ease with stop motion and to impressing clients. My clients LOVE to see their images pop up on my computer as I’m shooting. It’s easy for them to see the progress of the shoot and if anything needs adjusting that I may have not known. If I tether to my computer, I can cull and edit my images as I go, cutting back on my post-production time later.
Yes, this gear is an investment, but it’s all worth it. And you don’t need to get all of this stuff right at the same time. Start out with a camera and two lenses and practice shooting. Many photographers are amazing at using natural light, but I firmly believe you need to know how to utilize both. Once you’re ready, then invest in some starter lights. You’ll be well on your way to amazing images!
you said: